Zaptec Pro, Home and GO
Prerequisites
- The integration uses a cloud-to-cloud connection. An active internet connection of the Zaptec charging stations is mandatory.
- You need access to the Zaptec Portal and to CLEMAP Load Management.
The setup is done in two parts: first in the Zaptec Portal, then in CLEMAP Load Management.
Part A – Zaptec Portal
1. Configure power management
- In the Zaptec Portal, open the relevant installation.
- Navigate to Settings → Power management.
- Enter the maximum circuit breaker values – marker 7 in the screenshot. Use the same value as the circuit protection you will enter in CLEMAP Load Management in step 4 (63 A in the example).
- Enable manual power control – marker 8 in the screenshot.
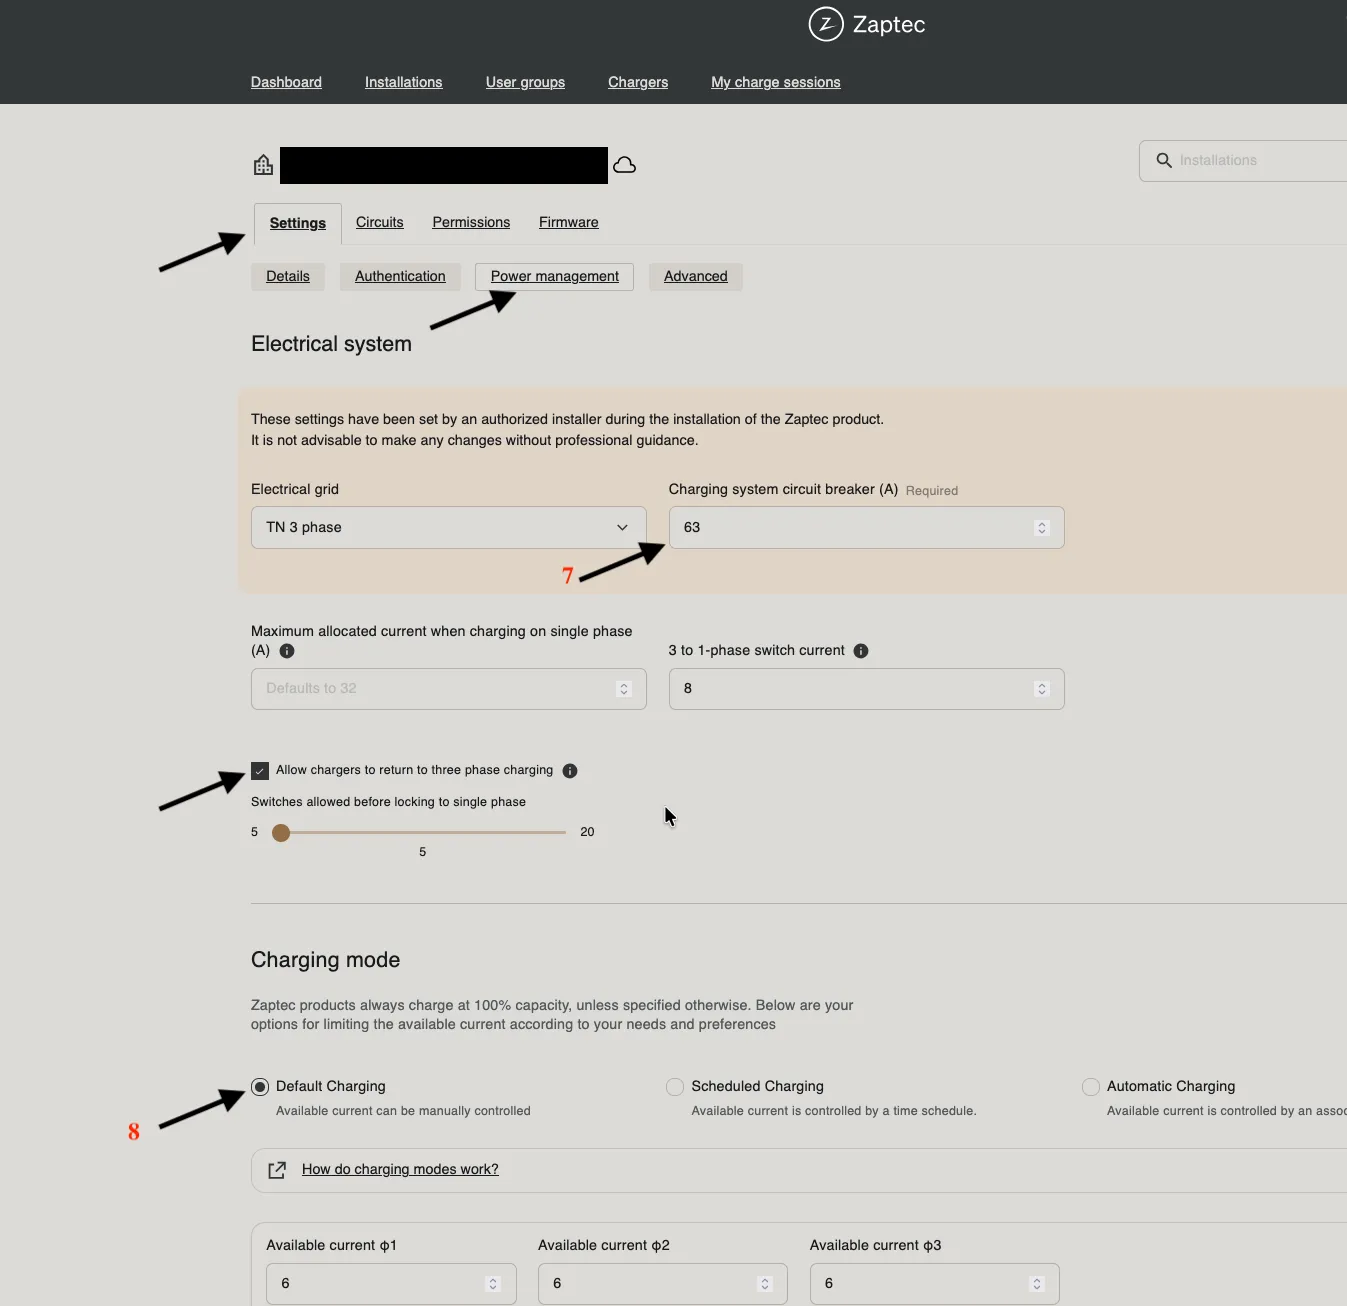
With manual power control enabled, CLEMAP Load Management takes over the dynamic allocation of the available current.
2. Copy the installation ID
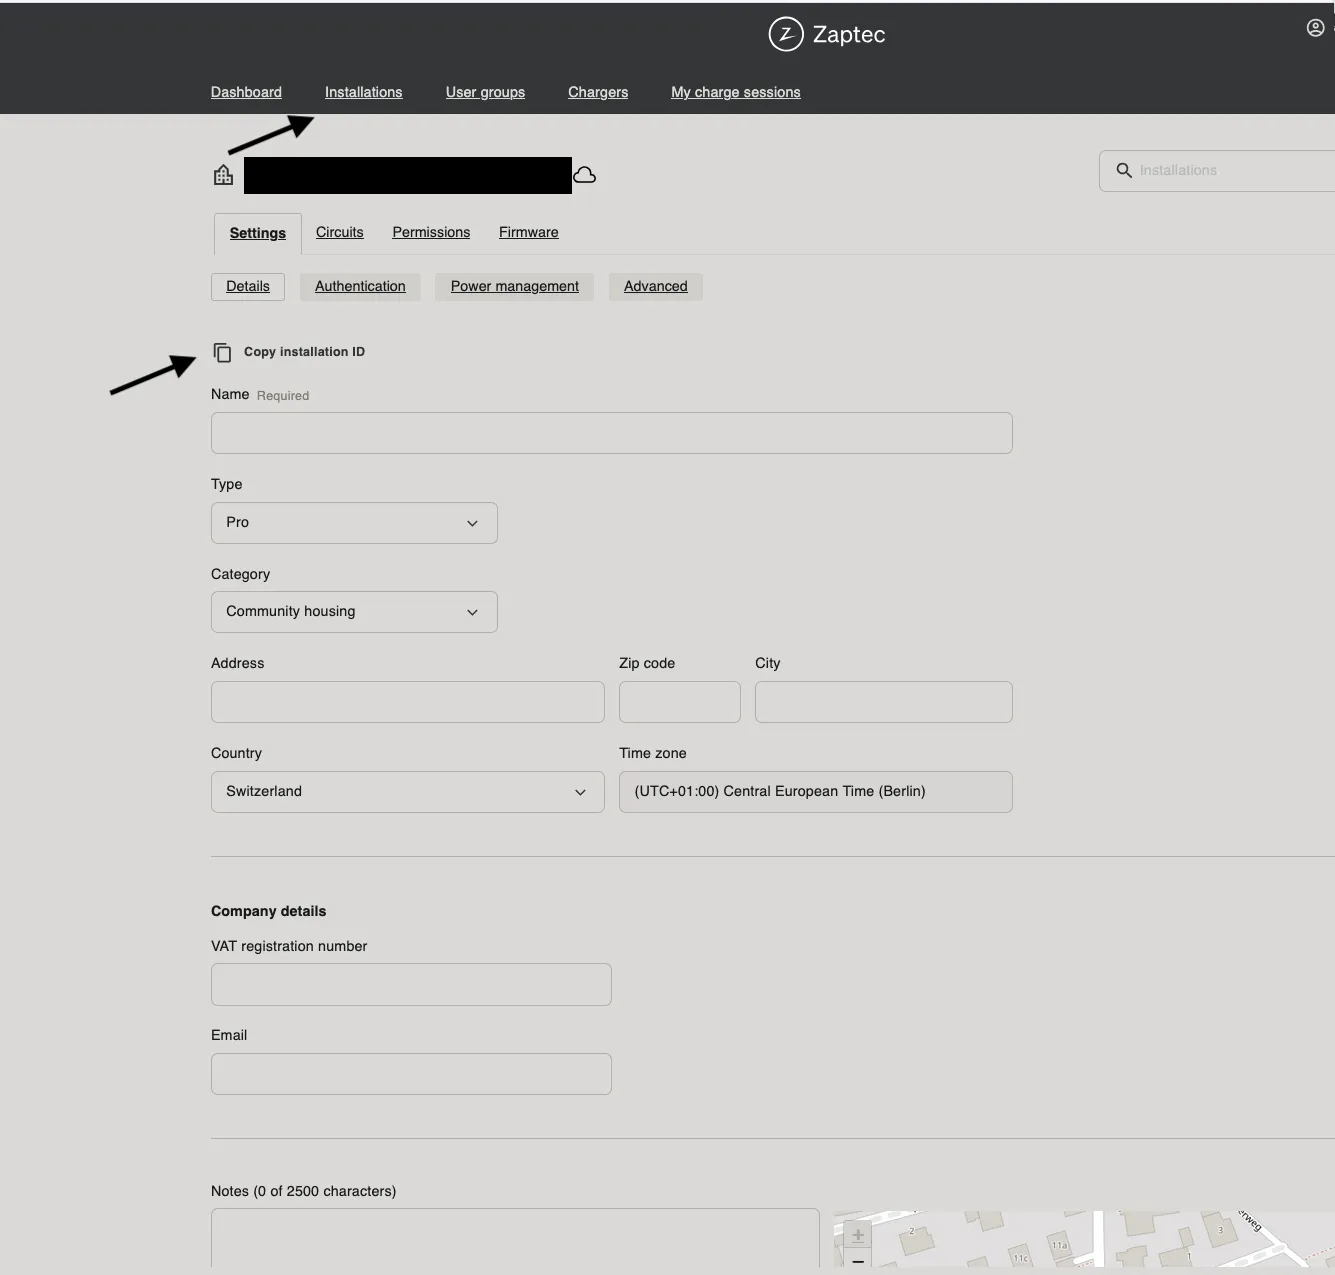
- In the Zaptec Portal, go to the Installations tab.
- Select the relevant installation.
- Copy the installation ID.
Part B – CLEMAP Load Management
3. Store the Zaptec credentials
Store your Zaptec credentials (username and password) in CLEMAP Load Management. Without these credentials, CLEMAP cannot communicate with the Zaptec cloud.
Detailed instructions: Cloud-Anbieter Zugangsdaten
4. Add the charging station
- In CLEMAP Load Management, open the EV charger setup.
- Select Zaptec Pro as the charging station. This selection also applies to Zaptec Home and Zaptec GO.
- Paste the installation ID copied in step 2.
- Enter the circuit protection. It must match the circuit breaker values from step 1 in the Zaptec Portal.
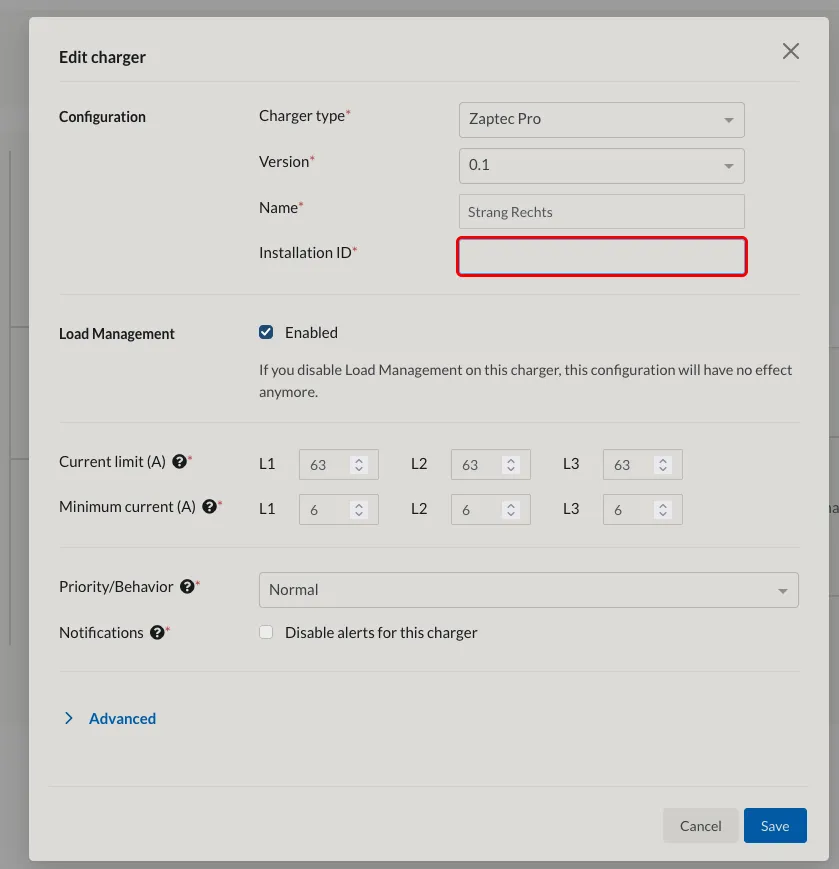
Note: Enter the protection of the circuit, not the limit of the individual charging station. In the example shown, the circuit is protected with 63 A and the main fuse with 125 A.
Recommendation: For Zaptec charging stations, set a minimum current of 16 A for the circuit in CLEMAP Load Management.